 |
| Pumpkin Friends |
My girlie LOVES to do crafts! She found a pumpkin man project she wanted to try to tackle this fall. Let me tell you...this was a long time-consuming project! I will show you the photo steps necessary to complete this little cutie, but I have to warn you if you try it...it IS a LABOR of love!
 |
| Supplies: These foam balls were a fraction of the cost of Styrofoam. All supplies can be found at Michael's. |
 |
| Placing clay around foam ball. |
 |
| It's best to slightly wet fingers to spread clay around in thin layer. |
 |
| Gently press clay around the ball. |
 |
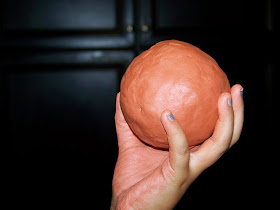
| This is what the ball should look like when covered. A dab of water smooths it out nicely. |
 |
| Champion crafter |
 |
| Now to make pumpkin creases |
 |
| This is the end of a paintbrush. |
 |
| Looking very pumpkin-y! |
 |
| Add the toothpick arms. Apply glue to the toothpick before inserting. |
 |
| Add the little hands. |
 |
| Drilling holes for the legs. Do not glue legs in yet. |
 |
| The Workers |
 |
| Hmmm....What next? |
 |
| Everyone quietly working away...Pure concentration! |
 |
| Stand painted. Legs glued into block. |
 |
| Now, form clay feet. Oh great! Blocks need to be repainted! |
 |
| Hats in place...hopefully! |
 |
| Four little pumpkin heads |
 |
| Painting....painting...painting! |
 |
| Drying |
 |
| The friends! One little pumpkin had a tragic accident...kind of like Humpty Dumpty. |
 |
| Project Complete! Yay! Happy Halloween! |


No comments:
Post a Comment